

Are you thinking of creating a cryptocurrency or token? If so, you’ve come to the right place! In this article I will be taking a practical step by step look on how to do this. I wanted to create a token for our platform Pop Up World, so I’m going to take you through the steps I went through to create the PopUpWorld Token (PUW). These can be used to offer rewards to customers or be held or exchanged for a potential increase in value.
The Ethereum block chain is one option to get started, the plus side of Ethereum is that ERC20 tokens can be created easily, however the fees can be quite high. When looking to create a token for Pop Up World, Cardano seemed like a good option.
The Cardano ecosystem looks like it has great scalability and has relatively low fees compared to Ethereum. Cardano was founded by a former co-founder of Ethereum, Charles Hoskinson
Although at the time of writing Cardano does not offer smart contracts (it is something that is pipelined for sometime in the near future)- ** Amended Smart Contracts have been available since Sept 2021) the good news is that Cardano does not need smart contracts to create a token, so fewer coding and security risks to worry about!
Creating your own token is not that difficult but you should set aside a few hours, as the Cardano process has quite a few steps to navigate.
These are the steps covered:
- Creation of a Cardano Node.
- Minting your token.
- Creation of Off Chain Metadata.
- Submitting of your token to the Cardano Token Registry.
- Sending your token to a remote address.
First things first, everything here was done on a Windows 10 PC. So, if you are on a Mac it should work but you will need to ensure you download the right files for your machine.
If you have not used Ubuntu Linux before, familiarise yourself with the commands for changing directories (cd), making directories (mkdir) copying files (cp) and others so you can move around the system easily.
Also, if you are new to this it’s probably best to try the Testnet blockchain first before you attempt to go live on Mainnet.
So here we go!
Building a Cardano Node:
Go to the Ubuntu website. We are going to use a Linux terminal to connect to the Cardano Node and submit instructions to the Block Chain.

https://ubuntu.com/wsl

Follow the instructions to enable WSL on your machine

and Download Ubuntu Terminal onto your machine.
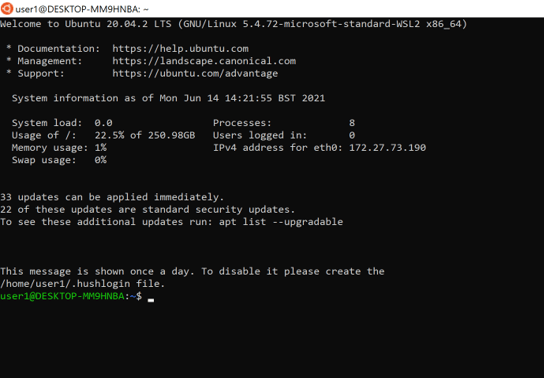
In the Ubuntu Terminal type:
sudo apt-get update -y
sudo apt-get install automake build-essential pkg-config libffi-dev libgmp-dev libssl-dev libtinfo-dev libsystemd-dev zlib1g-dev make g++ tmux git jq wget libncursesw5 libtool autoconf -y
Then download cabal from Haskell site go to https://www.haskell.org/cabal/download.html
****For mainnet use v3.2.0.0
curl -O http://urlofdownload.tar.gz
tar -xf file.tar.gz
This should create a Cabal executable – then move the Cabal file to local bin:
mv cabal ~/.local/bin/
cabal update
Confirm cabal install and version
cabal –version
v 3.2.0.0
Download GHC Compiler – enter the following commands:
wget https://downloads.haskell.org/ghc/8.10.2/ghc-8.10.2-x86_64-deb9-linux.tar.xz
tar -xf ghc-8.10.2-x86_64-deb9-linux.tar.xz
rm ghc-8.10.2-x86_64-deb9-linux.tar.xz
cd ghc-8.10.2
./configure
sudo make install
Install libsodium
mkdir -p ~/src
cd ~/src
git clone https://github.com/input-output-hk/libsodium
cd libsodium
git checkout 66f017f1
./autogen.sh
./configure
make
sudo make install
Type (or add to .bashrc file)
export LD_LIBRARY_PATH=”/usr/local/lib:$LD_LIBRARY_PATH”
export PKG_CONFIG_PATH=”/usr/local/lib/pkgconfig:$PKG_CONFIG_PATH”
Download the Cardano Node
git clone https://github.com/input-output-hk/cardano-node.git
Change the working directory to the downloaded source code folder:
cd cardano-node
Check the latest version of Cardano Node and choose latest version – place this instead of <VERSION>
git fetch –all –recurse-submodules –tags
git tag
git checkout tags/<VERSION>
Configure Build Options
cabal configure –with-compiler=ghc-8.10.2
Build and Install the Node
cabal build all
Copy executables bin-path.sh cardano-node and cardano-cli to your .local/bin/ directory
cp -p “$(/path/to/cardano-node/scripts/bin-path.sh cardano-node)” ~/.local/bin/
cp -p “$(/path/to/cardano-node/scripts/bin-path.sh cardano-cli)” ~/.local/bin/
Test Cardano Version installed
cardano-cli –version
Run prerequisites – these commands will download all the json files necessary for the node to run.
For Mainnet install
Testnet install
Run the Node by running the code below:
FOR TESTNET
cardano-node run \
–topology testnet-topology.json \
–database-path ~/config/db \
–socket-path ~/config/db/node.socket \
–host-addr 0.0.0.0 \
–port 3001 \
–config testnet-config.json
FOR MAINNET
cardano-node run \
–topology mainnet-topology.json \
–database-path ~/mainconfig/db \
–socket-path ~/mainconfig/db/node.socket \
–host-addr 0.0.0.0 \
–port 3001 \
–config mainnet-config.json
Important ***Use relative paths i.e “~” the socket file and db directory will be created automatically.
Point socket path and database path to an empty directory of your choosing.
If the node exits with an error :
ERROR: cardano-node: symbol lookup error: cardano-node: undefined symbol: crypto_vrf_publickeybytes
export LD_LIBRARY_PATH=”/usr/local/lib:$LD_LIBRARY_PATH”
export PKG_CONFIG_PATH=”/usr/local/lib/pkgconfig:$PKG_CONFIG_PATH”
This error is caused by a missing path (libsodium).

Your node should start connecting.
Open a new Ubuntu terminal window with the node running in the background then:
(In the new terminal)
echo export CARDANO_NODE_SOCKET_PATH=”~/mainconfig/db/node.socket” >> $HOME/.bashrc
source $HOME/.bashrc
Query the node – check – takes a while for node to catch up to current transactions.
cardano-cli query tip –mainnet
Result will look something like this:
{
“epoch”: Null,
“hash”: “c8e0010c753b5e6ce284926def428498ded9064cd7f085f190494f8d2208f794”,
“slot”: 17020929,
“block”: 5107443,
“era”: “Byron”
}
(use – testnet-magic 1097911063) for testnet install
If all is good well done, your Cardano Node is up and running! Leave it running and carry on to create your Token!

Create Token
Faucet (cardano.org) – for test ADA
If you are using Testnet you can get test ADA (Cardano cryptocurrency) from the link above for your test transactions. If you are using Mainnet, you will need to get some Ada into your digital wallet and transfer it later. You can use the Yoroi wallet which is approved for use with Cardano.
Next, we are going to create some security keys that are going to be necessary to create and sign our transactions on the network. Remember if you are on the mainnet, substitute –– — testnet-magic 1097911063 with –mainnet.
Generate verification and signing key
cardano-cli address key-gen \
–verification-key-file pay.vkey \
–signing-key-file pay.skey
Generate Payment Address – This is where you will send your testAda or Ada for your transactions.
cardano-cli address build \
–payment-verification-key-file pay.vkey \
–out-file pay.addr \
— testnet-magic 1097911063
For mainnet
cardano-cli address build \
–payment-verification-key-file pay.vkey \
–out-file pay.addr \
–mainnet
Check balance of Payment Address
more pay.addr -to display payment address
Will display the created payment address for example:
addr1vyjhgepw476vfr5qnr6q3s788qr8j0wsewqua7hfdx2sxqsnfkmxc
Check the address using the following command
cardano-cli query utxo –address addr_test1vq44equd73gx0c3kyxwuydlul7mhu5vc2s946ncas6jnnegruqyrt –-testnet-magic 1097911063
For Mainnet
cardano-cli query utxo –address addr1vyjhgepw476vfr5qnr6q3s788qr8j0wsewqua7hfdx2sxqsnfkmxc –mainnet
These commands will not work until your node reaches the "Shelley" area – So wait! It can take some time depending on your machine and connection.
Fund the payment address and check with:
cardano-cli query utxo –address addr1vyjhgepw476vfr5qnr6q3s788qr8j0wsewqua7hfdx2sxqsnfkmxc –mainnet
When you see your funds continue with:
Export Protocol parameters to a file to use later
cardano-cli query protocol-parameters \
–mainnet \
–out-file protocol.json
Generate Policy
mkdir policy
cardano-cli address key-gen \
–verification-key-file policy/policy.vkey \
–signing-key-file policy/policy.skey
Create Policy Script File
touch policy/policy.script && echo “” > policy/policy.script
Populate the File
echo “{” >> policy/policy.script
echo ” \”keyHash\”: \”$(cardano-cli address key-hash –payment-verification-key-file policy/policy.vkey)\”,” >> policy/policy.script
echo ” \”type\”: \”sig\”” >> policy/policy.script
echo “}” >> policy/policy.script
Generate Policy ID
cardano-cli transaction policyid –script-file ./policy/policy.script >> policy/policyID
Great Stuff! We can now continue to add some Metadata to our token.

Create meta data
Create a file with cat >metadata.json
Fill in the variables in the metadata below.
PolicyID and your TokenName. You can find the policyID with the command – more policyID in the policy directory. Change the website and facebook details to your own.
Copy Meta Data below the line and paste in the metadata.json file you opened then cntrl z to exit.
———————————————————————————
{“721”:{
“policyID“: {
“TICKER”: {
“name”: “TokenName“,
“image”: “”,
“nsfw”: “False”,
“copyright”: “Copyright © PUW media Ltd 2021”,
“Version”: “1”,
“id”:”1″,
“collection”: “”,
“url”: “https://www.popupworld.co.uk”,
“Facebook”: “https://www.facebook.com/popupworlduk”,
“Twitter”: “https://twitter.com/Pop_Up_World”
}
}
}
}
Build Transaction – next we need to build a transaction that will contain all the details of our token.
Here is the code. We will need to substitute our values into the code.
cardano-cli transaction build-raw \
–mary-era \
–fee 0 \
–tx-in $txhashlocationfunds#0 \
–tx-out $Receivepaymentaddress+0+”$Numberoftokens $policyidstring.$tokenname1” \
–mint “$Numberoftokens $policyidstring.$tokenname1” \
–metadata-json-file metadata.json \
–minting-script-file policy.script \
–out-file matx.raw
Source location of funds and enter Txhash into the transaction – You will need to fund the payment address to mint your token, check that the funds are available with the following command. (Use your own payment address).
cardano-cli query utxo –address addr1vyjhgepw476vfr5qnr6q3s788qr8j0wsewqua7hfdx2sxqsnfkmxc –mainnet
Result:
TxHash TxIx Amount
————————————————————————————–
a7c103185d5a01c2691873e79017110575be2898b6d3e612064167a09377f409 0 2000000 lovelace
d432cd314c173e7ecc96ee9f0bea08a5818aed0799f14c63d80984b0cd50ca36 0 1400000 lovelace
Substitute the details into the code above. Enter receive payment address (pay.addr) send to yourself first.
addr1vyjhgepw476vfr5qnr6q3s788qr8j0wsewqua7hfdx2sxqsnfkmxc
Enter Number of Tokens: eg: 77777000000
Add PolicyId string: 87a59599f8f47db431de642329a275cd4b297f21f1517af9db442cff
Add Token Name: YourTokenName
Enter Number of Tokens: 77777000000
Add PolicyId string: 87a59599f8f47db431de642329a275cd4b297f21f1517af9db442cff
Add Token Name: eg: YourTokenName
Code with all substitutions
cardano-cli transaction build-raw \
–mary-era \
–fee 0 \
–tx-in a7c103185d5a01c2691873e79017110575be2898b6d3e612064167a09377f409#0 \
–tx-out addr1vyjhgepw476vfr5qnr6q3s788qr8j0wsewqua7hfdx2sxqsnfkmxc+0+”77777000000 87a59599f8f47db431de642329a275cd4b297f21f1517af9db442cff.YourTokenName” \
–mint “77777000000 87a59599f8f47db431de642329a275cd4b297f21f1517af9db442cff.YourTokenName” \
–metadata-json-file metadata.json \
–minting-script-file policy.script \
–out-file matx.raw
Calculate minimum Fee – We need to calculate the fee required for this transaction.
Copy protocol.json into Policy folder
cp protocol.json policy
cardano-cli transaction calculate-min-fee \
–tx-body-file matx.raw \
–tx-in-count 1 \
–tx-out-count 1 \
–witness-count 2 \
–testnet-magic 1097911063\
–protocol-params-file protocol.json
**Remember mainnet for live
cardano-cli transaction calculate-min-fee \
–tx-body-file matx.raw \
–tx-in-count 1 \
–tx-out-count 1 \
–witness-count 2 \
–mainnet \
–protocol-params-file protocol.json
Result 196433 Lovelace
We now have the Fee 196433 we need to calculate the remaining Balance after subtracting the Fee. Where Funds is the amount of funds in the address.
Balance = Funds – Fee
Balance= 2000000 – 196433
expr 2000000 – 196433
Balance = 1803567
Insert Fee and Balance in a second transaction
Build transaction again with the fee and Balance
cardano-cli transaction build-raw \
–mary-era \
–fee 196433 \
–tx-in a7c103185d5a01c2691873e79017110575be2898b6d3e612064167a09377f409#0 \
–tx-out addr1vyjhgepw476vfr5qnr6q3s788qr8j0wsewqua7hfdx2sxqsnfkmxc+1803567+”77777000000 87a59599f8f47db431de642329a275cd4b297f21f1517af9db442cff.YourTokenName” \
–mint “77777000000 87a59599f8f47db431de642329a275cd4b297f21f1517af9db442cff.YourTokenName” \
–metadata-json-file metadata.json \
–minting-script-file policy.script \
–out-file matx.raw
Sign the transaction
cardano-cli transaction sign \

--signing-key-file pay.skey \

--signing-key-file policy.skey \

--mainnet \

--tx-body-file matx.raw \

--out-file matx.signed
Submit the transaction
cardano-cli transaction submit –tx-file matx.signed –mainnet
**for testnet substitute –testnet-magic 1097911063
Query again to view newly minted tokens!
cardano-cli query utxo –address addr1vyjhgepw476vfr5qnr6q3s788qr8j0wsewqua7hfdx2sxqsnfkmxc –mainnet
Result:
TxHash TxIx Amount
————————————————————————————–
0420abeb59cac0e8f92f63b4591c9a4cd3bb19d82456f5bcdeebe6de94faed11 0 1803567 lovelace + 77777000000 87a59599f8f47db431de642329a275cd4b297f21f1517af9db442cee.YourTokenName
d432cd314c173e7ecc96ee9f0bea08a5818aed0799f14c63d80984b0cd50ca36 0 1400000 lovelace
YAY! You have created your Token!

Next Register the token using OffChain Meta Data
Cardano uses an off chain registry to store metadata if you want to register your token follow the process below.
Download token-metadata-creator via github
git clone https://github.com/input-output-hk/offchain-metadata-tools.git

Install Nix
curl -L https://nixos.org/nix/install | sh
source $home/.nix-profile/etc/profile.d/nix.sh
Build Nix
nix-build -A project
Run Developer Shell
nix-shell default.nix -A shell
nix-build -A token-metadata-creator
Create a Metadata subject – this consists of base 16 encoded PolicyID and AssetName
87a59599f8f47db431de642329a275cd4b297f21f1517af9db442cee.TokenName is the asset we created previously.
Base 16 encode the asset name
echo -n “YourTokenName” | xxd -ps
result:
506f705570576f726c64
To create the Subject add PolicyID to Base 16 encoded asset name
87a59599f8f47db431de642329a275cd4b297f21f1517af9db442cee506f705570576f726c64
Create a Draft File using the created Subject
token-metadata-creator entry –init 87a59599f8f47db431de642329a275cd4b297f21f1517af9db442cee506f705570576f726c64
(run in the nix shell using nix-shell default.nix -A shell first)
This will create a draft file .json.draft
87a59599f8f47db431de642329a275cd4b297f21f1517af9db442cee506f705570576f726c64.json.draft
Add necessary fields
token-metadata-creator entry <your subject>
token-metadata-creator entry 87a59599f8f47db431de642329a275cd4b297f21f1517af9db442cee506f705570576f726c64 \
–name “YourTokenName” \
–description “Your Token Description” \
–policy policy.json
Then add the Ticker, Url and Logo
token-metadata-creator entry 87a59599f8f47db431de642329a275cd4b297f21f1517af9db442cee506f705570576f726c64 \
–ticker “TKK” \
–url “https://www.popupworld.co.uk” \
–logo “Logo.png“
The PNG will be hashed in the draft file automatically keep the size down to kb
Sign the File
token-metadata-creator entry 87a59599f8f47db431de642329a275cd4b297f21f1517af9db442cee506f705570576f726c64 -a policy.skey
Finalise the submission
token-metadata-creator entry 87a59599f8f47db431de642329a275cd4b297f21f1517af9db442cee506f705570576f726c64 –finalize
YAY! You’ve created your offchain json file.

Now you need to submit the file to the Token Registry Via Github
Go to:
https://github.com/cardano-foundation/cardano-token-registry
Login to Github
Fork a copy of cardano-foundation/cardano-token-registry to your account by clicking Fork in the top right corner.

Clone a local copy
git clone git@github.com:yourgithubusername/cardano-token-registry
cd cardano-token-registry
If you get error permission denied you will need to create SSH key.
Error: Permission denied (publickey) – GitHub Docs
You will need to generate a new SSH key and associate with Github
ssh-keygen -t ed25519 -Cyour_email@example.com
Enter file in which to save the key (/home/user1/.ssh/id_ed25519): <Press Enter>
Enter passphrase (empty for no passphrase): <Enter a passphrase>
Enter same passphrase again: <enter Passphrase again>
Result:
Your identification has been saved in /home/user1/.ssh/id_ed25519
Your public key has been saved in /home/user1/.ssh/id_ed25519.pub
Copy Key to clipboard and place into Git hub

cd  ~/.ssh

more id_ed25519.pub

Result:
ssh-ed25519 AXXXXXXXXXXXXXXXXXXXXXAAAIE6ZoDY2AsjiQgvDgnOpf+uPn8swJ57mRsWRd3KP3RE1 Email@youremail.co.uk
Copy to clipboard cntrl C
In the upper-right corner of any GitHub page, click your profile photo, then click Settings.

Then on the left click SSH and GPG keys.
Click New SSH key or Add SSH key.
Clone from github if you received error.
git clone git@github.com:yourusername/cardano-token-registry
cd cardano-token-registry
Copy created json file to the mappings directory
cp 87a59599f8f47db431de642329a275cd4b297f21f1517af9db442cee506f705570576f726c64.json cardano-token-registry/mappings/
Commit to the repo
git add mappings/87a59599f8f47db431de642329a275cd4b297f21f1517af9db442cee506f705570576f726c64.json
git config –global user.email “you@example.com”
git config –global user.name “Your Name”
git commit -m "YourTokenName"
git push origin HEAD
Result:
remote: Resolving deltas: 100% (2/2), completed with 2 local objects.
Create a Pull request from the fork
Go to your github page cardano-foundation/cardano-token-registry
Click on pull requests

And create a new pull request from Cardano Foundation.
Fill in the pull request template:
Pull Request Template
Description
New Token to registry
Type of change
[x ] Metadata related change
Other
Checklist:
[ X] For metadata related changes, this PR code passes the Github Actions metadata validation
And you’re done, YAY!!!

You can send your created token to a remote wallet. (Not advisable to send to an exchange). You can download a Cardano compatible wallet here https://yoroi-wallet.com/#/
As before we need to build a transaction.
cardano-cli transaction build-raw \
–fee $fee \
–tx-in $txhash#$txix \
–tx-out $RemotewalletAdress+1000000+”NumberofTokens $policyidstring.TokenName” \
–tx-out $address+$output+”0 $policyidstring.TokenName”
–out-file rec_matx.raw
Substitute values into the transaction
fee=”0″
RemoteWalletAddress=addr1qxraf5j2q4znkpwxrd6xhcyntq5tq5kfkhg5vadjuun2eek82kmkpaf5ex803hx8r95p2u59yt9405uhwd0ps2pnhd9qzksqem
reciever_output (1 ADA)=”10000000″
txhash=” 0420abeb59cac0e8f92f63b4591c9a4cd3bb19d82456f5bcdeebe6de94faed11″
txix=”0″
The Transaction with substitutions:
cardano-cli transaction build-raw \
–fee 0 \
–tx-in 0420abeb59cac0e8f92f63b4591c9a4cd3bb19d82456f5bcdeebe6de94faed11#0 \
–tx-out addr1qxraf5j2q4znkpwxrd6xhcyntq5tq5kfkhg5vadjuun2eek82kmkpaf5ex803hx8r95p2u59yt9405uhwd0ps2pnhd9qzksqem+1000000 \
–out-file rec_matx.raw
Calculate Fees
cardano-cli transaction calculate-min-fee \
–tx-body-file rec_matx.raw \
–tx-in-count 1 \
–tx-out-count 1 \
–witness-count 2 \
–mainnet \
–protocol-params-file protocol.json
Result:
176149
Find remaining balance after the fee
cardano-cli query utxo –address addr1vyjhgepw476vfr5qnr6q3s788qr8j0wsewqua7hfdx2sxqsnfkmxc –mainnet
TxHash TxIx Amount
————————————————————————————–
0420abeb59cac0e8f92f63b4591c9a4cd3bb19d82456f5bcdeebe6de94faed11 0 1803567 lovelace + 77776000000 87a59599f8f47db431de642329a275cd4b297f21f1517af9db442cee.YourTokenName
d432cd314c173e7ecc96ee9f0bea08a5818aed0799f14c63d80984b0cd50ca36 0 1400000 lovelace
Balance = 1803567 – fee
Balance = 1803567 – 176149
Expr 1803567 – 176149
Balance = 1627418
The final transaction – enter the values into the transaction.
cardano-cli transaction build-raw \
–fee 176149 \
–tx-in 0420abeb59cac0e8f92f63b4591c9a4cd3bb19d82456f5bcdeebe6de94faed11#0 \
–tx-out addr1qxraf5j2q4znkpwxrd6xhcyntq5tq5kfkhg5vadjuun2eek82kmkpaf5ex803hx8r95p2u59yt9405uhwd0ps2pnhd9qzksqem+1627418+”77776000000 87a59599f8f47db431de642329a275cd4b297f21f1517af9db442cee.YourTokenName” \
–out-file rec_matx.raw
Sign the transaction
cardano-cli transaction sign –signing-key-file pay.skey –mainnet –tx-body-file rec_matx.raw –out-file rec_matx.signed
Send the transaction
cardano-cli transaction submit –tx-file rec_matx.signed –mainnet
Result:
Transaction successfully submitted.
Amazing! – Congrats – You have transferred your Token and ADA to a remote wallet.

My name is Graham Jules, founder of Pop Up World. I hope this was useful to you. Please feel free to send any donations to:
addr1q9me9av2luyfw3r72qug7hhhrgujyfupgmateej6cuqn7mk82kmkpaf5ex803hx8r95p2u59yt9405uhwd0ps2pnhd9q3ye3tl
If you would like some free PopUpWorld tokens register at htpps://www.popupworld.co.uk and message us with your receive address.

Want to learn how to stake on Cardano? Read this article:
Pop Up World YouTube Reviews:
Review. Convincing Crypto – English
Review. NFTsGuide – English
Review. Crypto Flo – English
Review. Crypto Universe – English
Review. Malik Atif – Hindi -Urdu
Review. Inside Crypto – Hindi – Urdu
Review. Crypto FLO – Portuguese
The Pop Up World Token is designed specifically for entrepreneurs, to store value and to utilise on our platform Pop Up World. Join the revolution in financial freedom today.
Pop Up World token (PUW) on Cardano Decentralised Exchanges (DeXs), MuesliSwap, SundeSwap, Wingriders and Minswap. Or click the link here:
Pop Up World token has a growing ecosystem
Earn and help support the Pop Up World Blog and entrepreneurs worldwide by joining our Pop Up World Stakepool! Go to https://popupworld.co.uk/popupworldstaking
Thanks!
It starts with an idea. Pop Up World is a platform that helps start-ups and small businesses reach for the stars. No matter what size you are. Use our start-up guide Business Zero to Superhero, Design your Logo. Connect with investors via our Investor Connector. You can start a Website and Domain name. You can Search for and promote your Premises. You can promote your idea for free on our Pop Up World Ads site, you can even form a Limited Company You can also join us on our journey via the Pop Up World Token (PUW).
Resources:
Cardano Token Registry for On-chain Identifiers — Cardano Documentation 1.0.0 documentation
Cardano Token Registry Process – CatalystFUND3 Episode3 – YouTube
cardano-node — cardano-node Documentation 1.0.0 documentation
Installing the node from source — cardano-node Documentation 1.0.0 documentation
Getting Started With Native Tokens — Cardano Documentation 1.0.0 documentation
Cardano Token Registry for On-chain Identifiers — Cardano Documentation 1.0.0 documentation
Thanks for Reading!

One thought on “How To Create Your Own Crypto Token Using Cardano – Step by Step.”